

Visual Perception – looking & seeing project
age: 8yrs plus
This two part creative science project explores the visual illusion which forms the basis of the whole movie industry – the ability of our brain to interpret a series of individual images as flowing movement if presented as sequences, one after the other, at speed.
Making the zoetrope
The first part of the project is to make a six sided spinning zoetrope from thin card, and to examine the optical illusion using the printed examples provided.
This making technology involves cutting, folding and gluing. The playful exploration uses rubber band power to make the zoetrope spin, and by looking at the images side-on you can to see the optical illusion of a moving picture.
Young children often have difficulty with optical devices, eg. looking through binoculars, down telescopes or microscopes. Traditional zoetropes have slots through which to view the images, as each image must be presented to the brain as a separate picture otherwise all that is seen is just a blur.
a traditional zoetrope:

the folded sides of this cardboard zoetrope design makes it easier for young children to see the moving images:

Creating your own animation
The second stage of the project is to create your own designs by drawing sequential images in the blank frames – a skill which requires both the ability to draw repeating images and careful consideration and analysis of the actual movements.
Start very simple – eg. a wriggly caterpillar, a thumping heart, or a stick figure person. It takes 4 steps to go from the start of the movement to the end, and then 2 more steps back to the beginning – 6 images in all.

Things you need to pay attention to:
- Parents often over estimate the abilities of their children in this project. It is important to understand you are not drawing a short story with a beginning and an end, but a repeating action which goes on and on.
- It is possible to leave the design stage till later – allowing time for playing with the different images and absorbing how it works.
- Check the images have been inserted into the zoetrope in the right order – 1, 2, 3, 4, 3, 2
Its good to know:
- You will need to print out the worksheets to do these projects – two of the sheets need to be printed onto thin card to make the zoetrope.
- The theory of Persistence of Vision by Dr Roget in 1825 was a new concept which caused a wide range of kinetic optical toys to be produced – from spinning tops, kaleidoscopes, thaumatropes, phenakistoscopes, to a variety zoetropes and flick books. Together with the development of photography this led very quickly to the development of movies in the 1890’s.
- Magic Lantern images had been projected onto screens as early as the 1660’s, but these only used ‘before’ and ‘after’ sequences, and flickering movements, not repetitive motion.
- The Phi Phenomenon is the current scientific theory behind moving images, developed by Max Wertheimer in 1912. See wikipedia – wikipedia: Phi Phenomenon. There is a lot of info online – many images of animation designs, and a good place to start is at the wikipedia Zoetrope page: wikipedia: Zoetrope
Materials & tools you will need:
- A4 thin card – 2 sheets (greetings card thickness – aprox. 130gm)
- A4 paper – at least 12 sheets
- a printer to print out the zoetrope and all the sample images
- re-usable sticky tack
- 2 rubber bands – about 8cm long
- a stapler
- plus the usual scissors, pencils, colour markers etc.
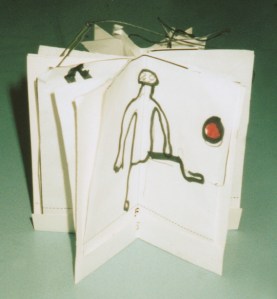
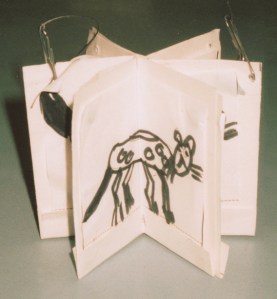
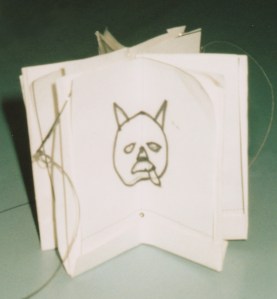
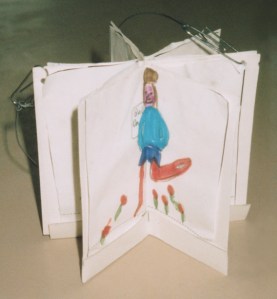
Here are a few photos of designs by children:


Click to view the PDF worksheets:

Background to our project:
We have run this project as creative science workshops many times over the years. The design shown here has been fully revised to consider the technical making skills of families working remotely without a workshop tutor to hand.
The most recent workshop was in 2017 at the Snape Maltings Flipside Arts Festival
click to view the workshop blog post:

